6 In-Field Techniques to Create Depth in Your Landscape Photographs
Why do you take photos of nature? To document the scene; to capture an incredible moment; to share how a place makes you feel? Chances are, it's all of the above. And if you're like me, photography also feeds your soul and helps you lose yourself in the moment. Regardless of what photography means to you, one thing is clear—communicating a 3D world through a 2D photograph boils down to how well you convey depth.
Depth provides a visceral realism to images. It tempts the viewer to look for a second longer, to explore and maybe even get lost in the photo. Luckily, landscape photographers have a number of in-field techniques they can employ to add depth. Today, I'll share six of my favorites.
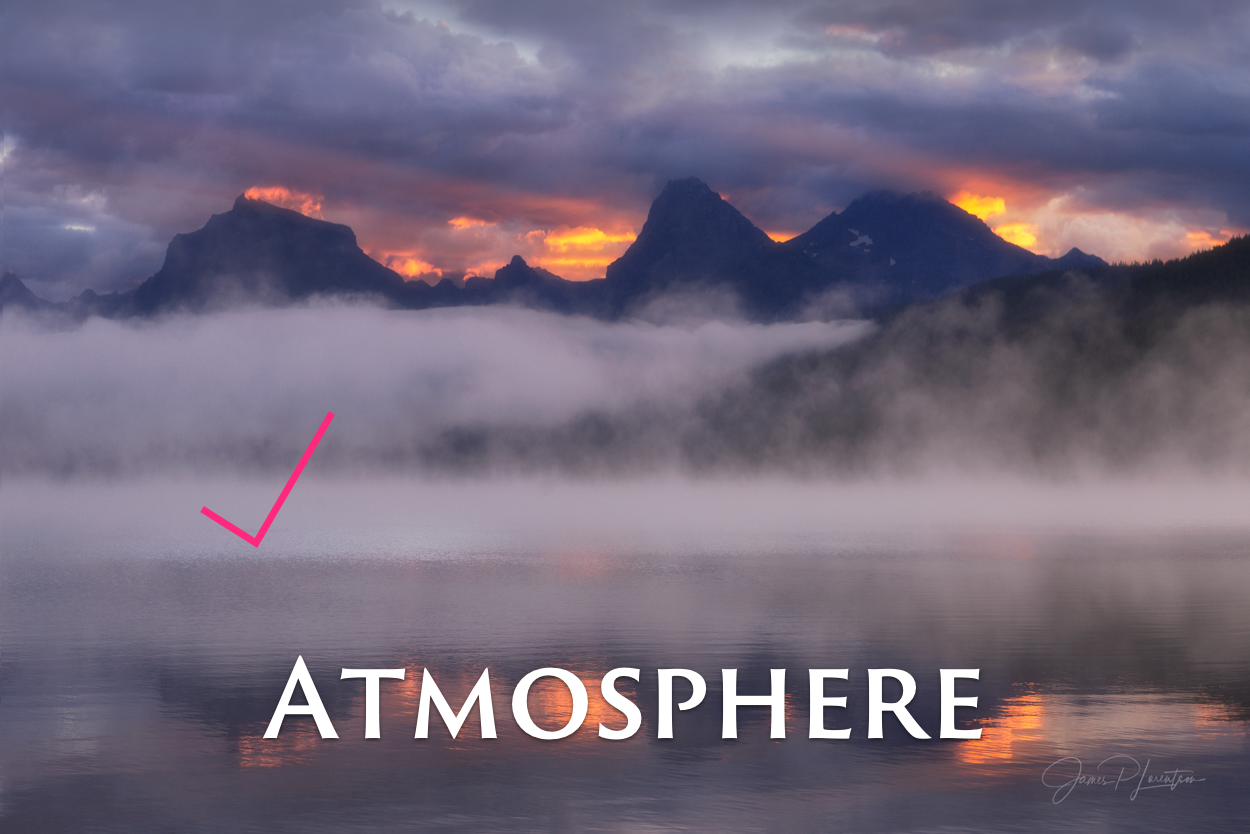
Atmosphere
Atmospheric elements like fog, snow and dust imbue images with mood, and can simplify the scene. What I learned is that atmosphere also creates depth.
"(the mist) kills any distractions...it's all diffused, like a painting." — Thomas Heaton.

Converging Lines (Wide Angle)
A wide-angle lens distorts parallel lines to appear as if they are converging on the distant horizon. Not only do these converging lines add depth, they also direct the viewer's eye.

Big-to-Small (Wide Angle)
Similar to the effect above, a wide-angle lens can create a big to small transition from near to far. Nearby objects appear larger that those further away. Notice how the nearby branches are significantly bigger than those in the midground despite them being the same size physically. This difference adds depth to the image.

Side-Light
Side-light highlights an object's three-dimensional form. It creates a highlight on one side of an object and a gradient to black on the side opposite the light. This type of light sculpts objects and reveals their form.
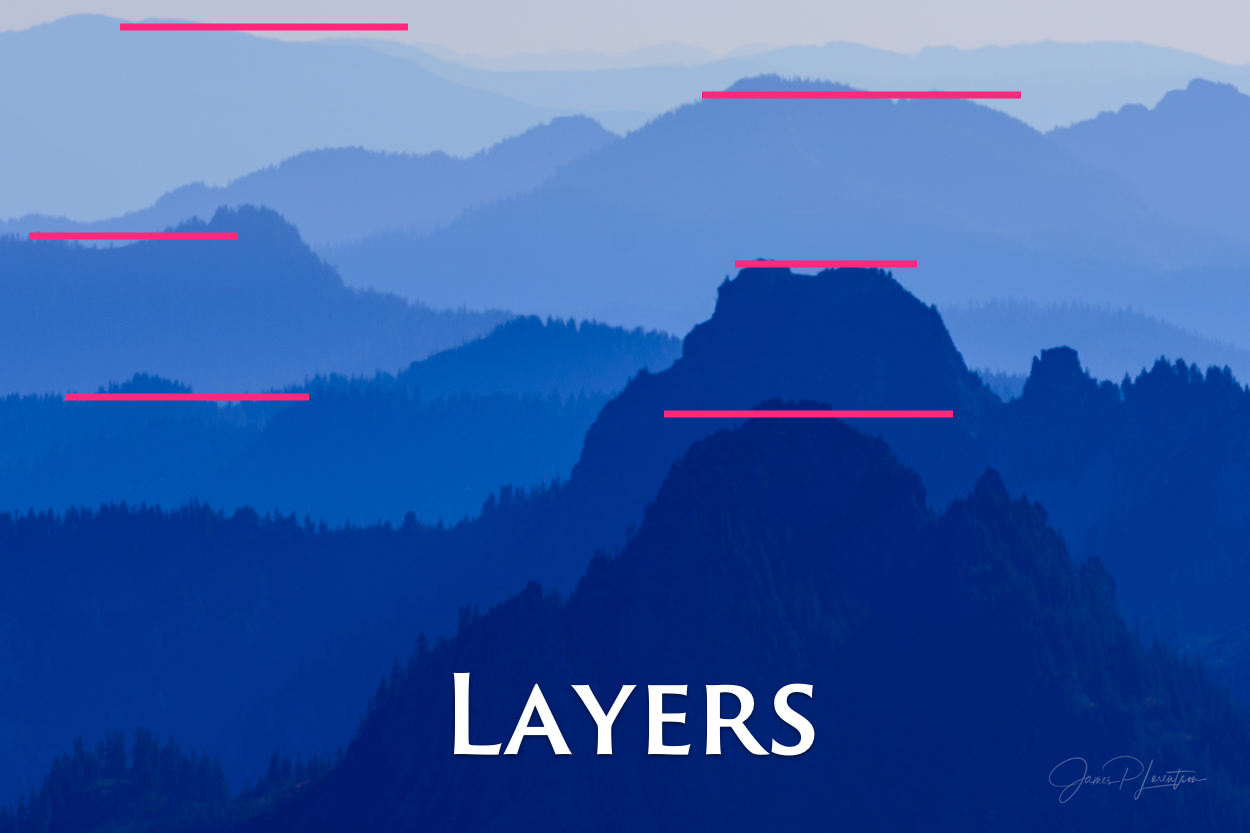
Layers (Telephoto)
A telephoto lens can reach out and capture smaller frames that highlight specific areas. In the blue hour photo here, the level of blacks fall as the viewer scans from near to far through the layers. This fading of blacks creates a sense of depth, and is the crux of a secret technique I'll be sharing in a future post.

Natural Frames
A natural frame pulls the viewer in to the center of the frame. These types of photos usually also constrain the brightest parts of the image to that which is within the frame. The viewer is invited into the frame, and this creates a sense of traveling through space.
Go Do it
It's a huge challenge to communicate our physical, emotional and spiritual experiences in nature through a small rectangle on a smartphone screen. But creating depth in your images is one way to turn a flat, two-dimensional photo into something more alive. Empowered with the tools above, I am ready to tackle any scene and come away with an image that breathes life to my experiences.
So my advice is this:
Don't run from fickle weather—embrace the atmosphere; look for natural frames; try positioning the sun to the side so that light wraps around your subject; find layers with your telephoto; and use your wide-angle lens to create converging lines and big-to-small transitions.
Stay tuned. In a future post, I'll discuss some techniques I use to add depth once I'm home and ready to edit; and I'll share a secret Photoshop tool I use to create depth that I've never seen discussed before.
To get these types of posts delivered directly to your inbox, please subscribe—it means a lot!